
This section covers finalizing Microsoft OAuth credentials through PowerShell implementation. Successful completion of the initial credential creation is prerequisite to this configuration process:
- Part 1 · Create Microsoft OAuth credentials
- Part 2 · Finalize Microsoft OAuth credentials using PowerShell · (you are here)
- Part 3 · Send first email using Microsoft OAuth credentials
PowerShell is required to complete the OAuth setup, allowing Automation Workshop to securely authenticate with Microsoft services.
Keep your Automation Workshop up-to-date to enjoy seamless integration with Microsoft email services. Regular updates ensure you benefit from the latest compatibility improvements as Microsoft continues to evolve their diverse email server configurations. This helps maintain reliable connections even as Microsoft's infrastructure changes over time.
PowerShell…
While Microsoft Entra allows you to register and configure applications through the web interface, some essential steps—such as assigning mailbox access to the application and creating a service principal—can only be completed via PowerShell.
These actions are required to allow your app to send emails on behalf of users or shared mailboxes in a fully automated, headless environment. Without these configurations, the OAuth flow remains incomplete and the credentials will not function as intended.
Run as Admin
To begin, launch Windows PowerShell as Administrator. This is important because some of the commands you will be running require elevated permissions to interact with Microsoft 365 services and modify organization-level settings. You can do this by searching for PowerShell in the Start menu, right-clicking it, and selecting Run as administrator.
Windows PowerShell
Copyright (C) Microsoft Corporation. All rights reserved.

PS C:\Users\Admin>
Once open, make sure you are at a prompt showing your user path—this indicates you are ready to enter commands. If you are prompted with a User Account Control (UAC) dialog, be sure to allow it.
This administrative shell will be your main interface for completing the configuration steps that are not available through the web portal.
Prepare…
Before you can proceed with Exchange Online-specific commands, a few initial preparations are required to ensure your PowerShell environment is ready and secure.
Install
In the first step, you'll install the ExchangeOnlineManagement module. This module contains the cmdlets needed to manage mailbox permissions, service principals, and related settings. When running the installation command, PowerShell may prompt you to install the NuGet provider—this is necessary for downloading and installing modules from online repositories. Simply type Y to proceed.
You may also be warned that the source is untrusted, but PSGallery is hosted by Microsoft, this is a common message, and you can confirm by typing Y again.
Install-Module -Name ExchangeOnlineManagement

NuGet provider is required to continue
PowerShellGet requires NuGet provider version '2.8.5.201' or newer to interact with NuGet-based repositories. The NuGet provider must be available in 'C:\Program Files\PackageManagement\ProviderAssemblies' or 'C:\Users\Admin\AppData\Local\PackageManagement\ProviderAssemblies'. You can also install the NuGet provider by running 'Install-PackageProvider -Name NuGet -MinimumVersion 2.8.5.201 -Force'. Do you want PowerShellGet to install and import the NuGet provider now?
[Y] Yes  [N] No  [S] Suspend  [?] Help (default is "Y"): Y

Untrusted repository
You are installing the modules from an untrusted repository. If you trust this repository, change its InstallationPolicy value by running the Set-PSRepository cmdlet. Are you sure you want to install the modules from 'PSGallery'?
[Y] Yes  [N] No  [L] No to All  [S] Suspend  [?] Help: Y
Policy
Once the module is installed, you may also need to adjust PowerShell's execution policy. This step is essential because, by default, PowerShell restricts script execution for safety. You will want to change the policy to RemoteSigned, which allows locally created scripts to run while still requiring signatures for scripts downloaded from the internet.
This strikes a good balance between security and functionality. When prompted, confirm the change by typing Y once again.
Set-ExecutionPolicy RemoteSigned

Execution Policy Change
The execution policy helps protect you from scripts that you do not trust. Changing the execution policy might expose you to the security risks described in the about_Execution_Policies help topic at https://go.microsoft.com/fwlink/?LinkID=135170. Do you want to change the execution policy?
[Y] Yes  [N] No  [S] Suspend  [?] Help (default is "N"): Y
Import
Once the module is successfully installed, the final part of the setup is to import it into your current PowerShell session. This allows you to start using the cmdlets provided by the Exchange Online module right away.
Import-module ExchangeOnlineManagement The Import-Module command makes sure that PowerShell can locate and load all necessary functions and tools for managing Exchange Online. If the module was installed correctly in the previous step, this command should complete silently without errors—and you are ready to begin actual configuration tasks.
Exchange Online…
After completing the preparation steps and importing the Exchange module, you are now ready to connect to your Microsoft 365 tenant using PowerShell.
Connect
In this step, you'll use the Connect-ExchangeOnline command, where the Organization parameter should be set to the Directory (tenant) ID you collected earlier. This establishes a secure connection to Exchange Online services for further management tasks.
Connect-ExchangeOnline -Organization 119277b3-a555-4c1b-8743-8223224e4896

----------------------------------------------------------------
This V3 EXO PowerShell module contains new REST API backed Exchange Online cmdlets which doesn't require WinRM for Client-Server communication. You can now run these cmdlets after turning off WinRM Basic Auth in your client machine thus making it more secure.

Unlike the EXO* prefixed cmdlets, the cmdlets in this module support full functional parity with the RPS (V1) cmdlets.

V3 cmdlets in the downloaded module are resilient to transient failures, handling retries and throttling errors inherently.

REST backed EOP and SCC cmdlets are also available in the V3 module. Similar to EXO, the cmdlets can be run without WinRM basic auth enabled.

For more information check https://aka.ms/exov3-module

Starting with EXO V3.7, use the LoadCmdletHelp parameter alongside Connect-ExchangeOnline to access the Get-Help cmdlet, as it will not loaded by default.
----------------------------------------------------------------
Once you execute the connection command, PowerShell will trigger Microsoft's sign-in flow. A new window will appear asking for your Microsoft 365 credentials—typically the email and password of a global administrator or another account with sufficient permissions to perform mailbox and directory changes.
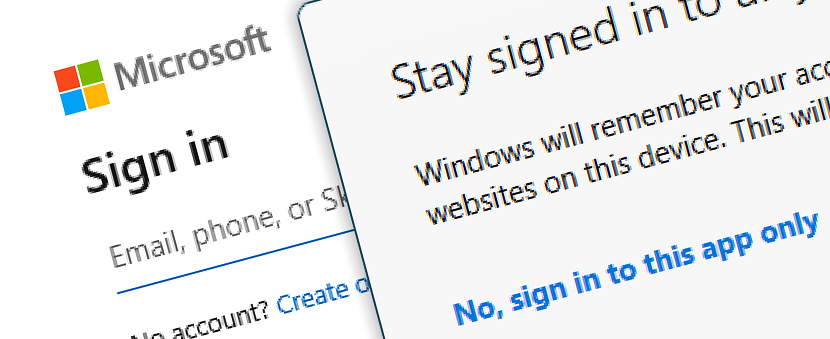
In the next dialog, Microsoft may prompt you with the option: "Stay signed in to all your apps?" or "Stay signed in to this app only?".
To keep your environment secure and avoid session bleed between tools, it's best to select: No, sign in to this app only (or a similarly phrased option). This ensures your credentials are only used within the current PowerShell session and not shared across other apps on your device.
Once signed in successfully, you're fully connected to Exchange Online and ready to proceed with the PowerShell commands that finalize the service principal and permission setup.
Principal
The next step is creating a service principal, which acts as the identity your application will use to access resources in Microsoft 365. This is a required part of enabling headless, app-only access to Exchange Online via OAuth.
- The Application (client) ID as the value for the AppId parameter.
- The Object ID (retrieved earlier from the Enterprise applications view) for the ObjectId parameter.
This ties your registered application to a service principal in the tenant, effectively registering it as a known and trusted identity within your organization.
New-ServicePrincipal -AppId 36621d9f-ff7d-4332-a717-acd4daff3e4b -ObjectId 61c9e487-2d88-466a-93df-72ef73c10a47

DisplayName        ObjectId                AppId
-----------        --------                -----
                   61c0e487-2d88-469a-9... 36612d8f-ff7d-4362...
Once successfully executed, PowerShell will display a confirmation, listing both the DisplayName and the IDs used. This confirms that the service principal is now created and ready to receive permissions.
Permissions
Now that the service principal is created, the final PowerShell task is to assign mailbox access permissions so that the application can actually send emails on behalf of a user.
In this step, you are using the Add-MailboxPermission command to give the Application (client) ID (acting as the User in this context) full access rights to a mailbox identified by its email address (Identity). This mailbox can be any valid, licensed user in your organization—usually the account from which emails will be sent.
Add-MailboxPermission -Identity "matthew.adams@example.com" -User 36621d9f-ff7d-4332-a717-acd4daff3e4b -AccessRights FullAccess

Identity        User              AccessRights IsInherited Deny
--------        ----              ------------ ----------- ----
abfd9d6d-ad8... S-1-5-21-35055... {FullAccess} False       False
The AccessRights: FullAccess part ensures that the application can perform actions such as reading from and sending emails via SMTP.
Once run, the output confirms the access was granted by listing the mailbox, the application (as a long SID or the AppID), and the applied permissions. This wraps up all the necessary PowerShell work—everything else will be done in the Automation Workshop UI.
Next steps…
Now that everything is in place in Microsoft Entra and Exchange Online, it is time to finish things up on the Automation Workshop side.
Head over to Part 3 · Send first email using Microsoft OAuth credentials where you will configure the credentials inside Automation Workshop.
Final notes
With the PowerShell steps complete, your Microsoft 365 environment is now ready to support headless OAuth 2.0 email automation. You have registered an app, created credentials, granted the necessary API permissions, and connected everything behind the scenes using PowerShell—something that is not yet available via Microsoft's web interface.
This setup ensures that Automation Workshop will be able to send emails securely, reliably, and without requiring interactive user logins. It is a service-style configuration, ideal for background jobs like scheduled notifications, backups, or automated reports.
Need a helping hand?
If you have any questions, please do not hesitate to contact our support team.