
The first step to integrate Google OAuth with Automation Workshop is to configure your Google Cloud project and OAuth consent screen. This essential setup creates the authentication framework required for sending emails securely through Google's servers. This must be configured before proceeding to subsequent step:
- Part 1 · Create Google OAuth credentials · (you are here)
- Part 2 · Send first email using Google OAuth credentials
Setting up OAuth credentials is crucial for enabling secure authentication when using Gmail or Google Workspace accounts with Automation Workshop.
Make sure your copy of Automation Workshop is up-to-date to ensure compatibility with the latest changes in Google's email infrastructure. Staying current allows seamless operation as Google evolves its authentication systems and security protocols.
Project…
Before we can configure OAuth credentials, Google requires that we first create a project. In Google Cloud terminology, a "project" is simply a container that holds configuration settings, API usage data, and service credentials—including OAuth 2.0 credentials. Although the name project may imply something complex, in this case it is primarily used for managing access and tracking usage.
Every OAuth 2.0 credential you create must belong to a project, so this step is necessary in order to proceed with setting up authentication for Automation Workshop.
Create a new project
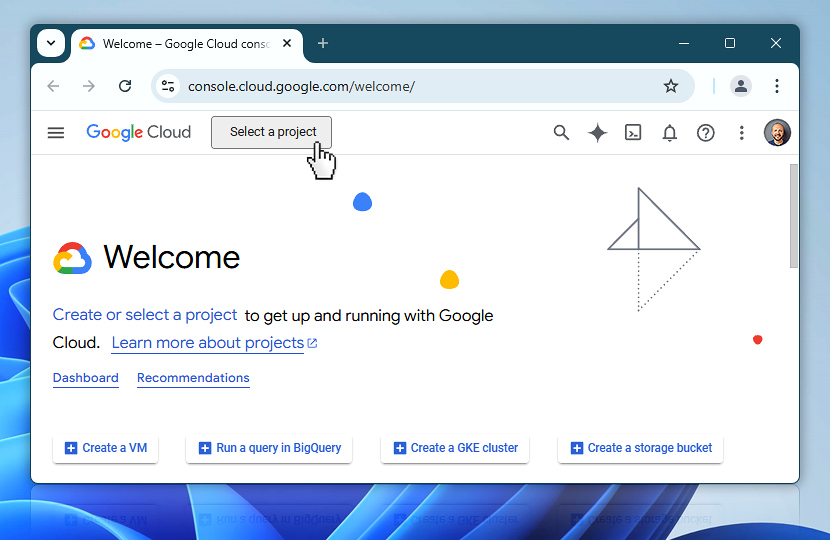
To begin, go to the Google Cloud Console and sign in with your Google account if prompted. On the Welcome screen, click the Select a project button located near the top of the page.
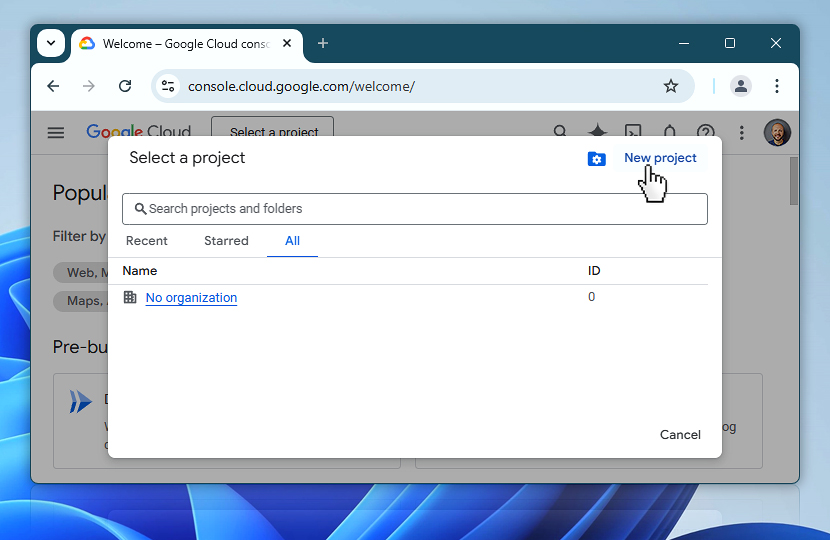
After clicking Select a project, a dialog will appear showing existing projects (if any). To continue with setting up OAuth for use with Automation Workshop, click the New project button in the top right corner.
This will begin the process of creating a dedicated Google Cloud project that will hold your OAuth 2.0 credentials and configuration for Automation Workshop. Even if you already have other projects listed, it is a good idea to create a separate one specifically for this integration to keep your credentials organized and isolated from unrelated services.
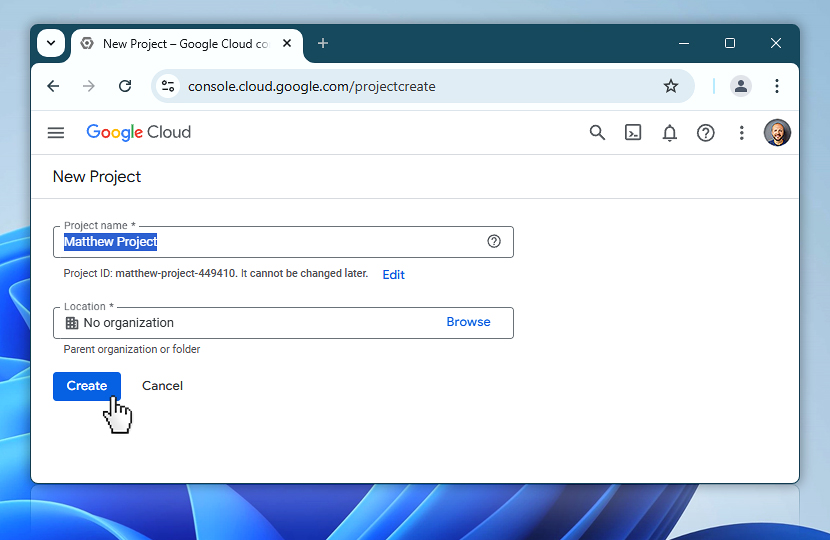
On the New Project screen, enter a name for your project. This name is for your own reference and can be anything that helps you identify it later—such as Matthew Project in this example. The Project ID is automatically generated and cannot be changed once created.
If your account is not part of a Google organization, the location will be listed as No organization, which is perfectly fine for personal or small business use. Once everything looks correct, click the Create button to proceed.
Select project
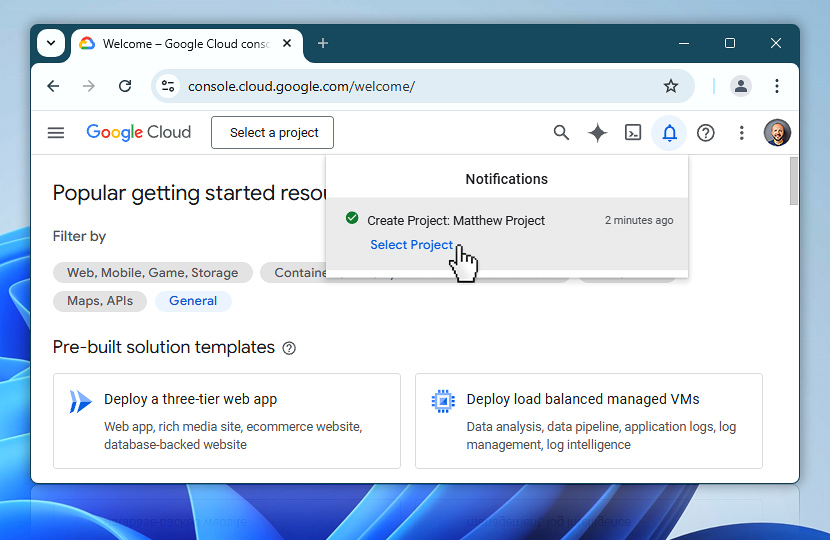
Once the project has been created, you will receive a notification in the top-right corner of the Google Cloud Console. Click the notification and then click the Select Project to activate the project you just created.
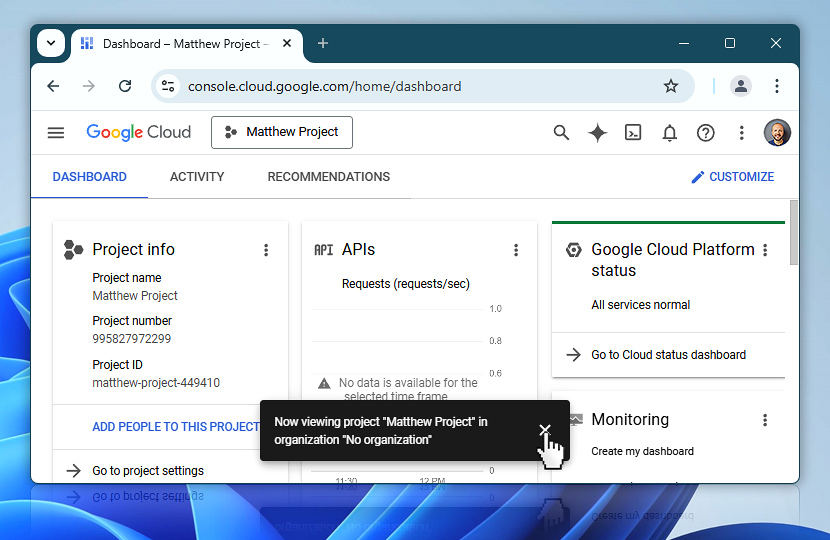
After selecting the project, you will be redirected to its dashboard. A confirmation popup will appear, notifying you that the project is now active.
From this point on, any configuration you apply—whether setting up OAuth consent or enabling APIs—will be specific to this project.
Enabled APIs & Services
To proceed with OAuth configuration, you must navigate to the API & Services section of your project. Open the Google Cloud menu and locate APIs & Services under Pinned products (or use View all products). Then, from the expanded list, select Enabled APIs & services.
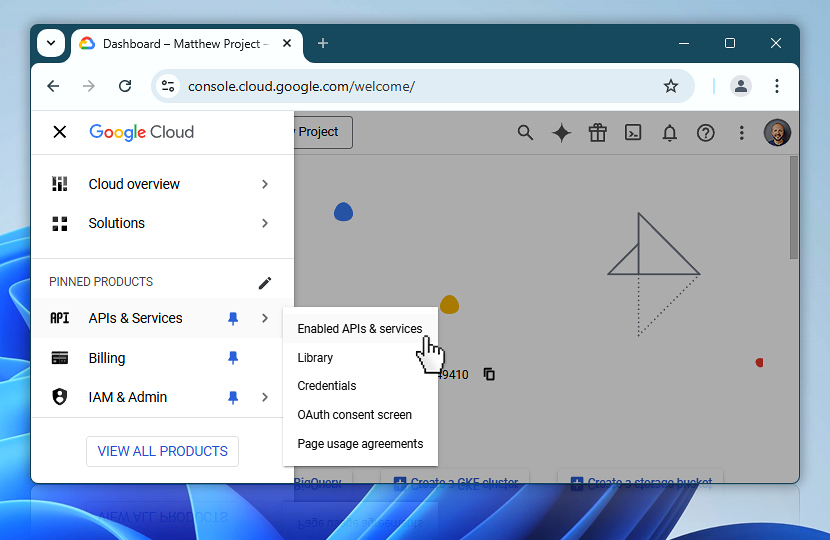
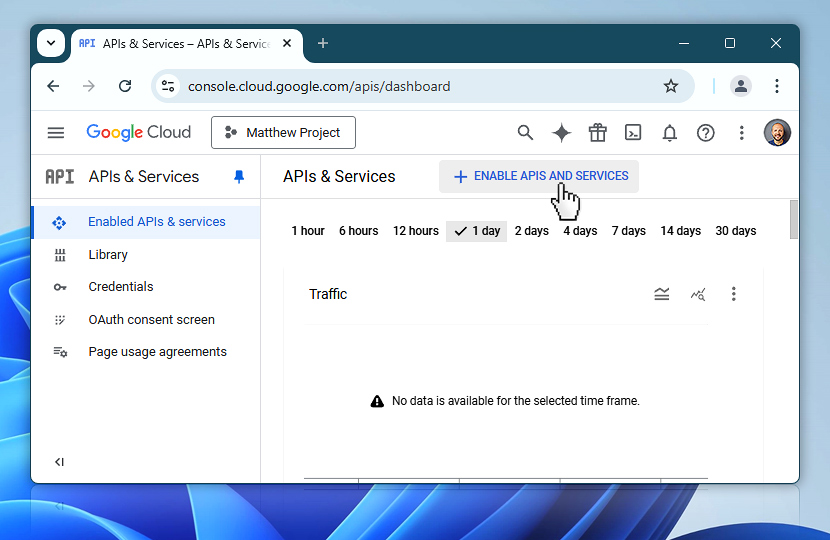
Click the Enabled APIs & services button at the top of the page. This will open the API Library, where you can search for and enable specific APIs required for your project, such as Gmail API to support OAuth functionality in Automation Workshop.
Gmail API
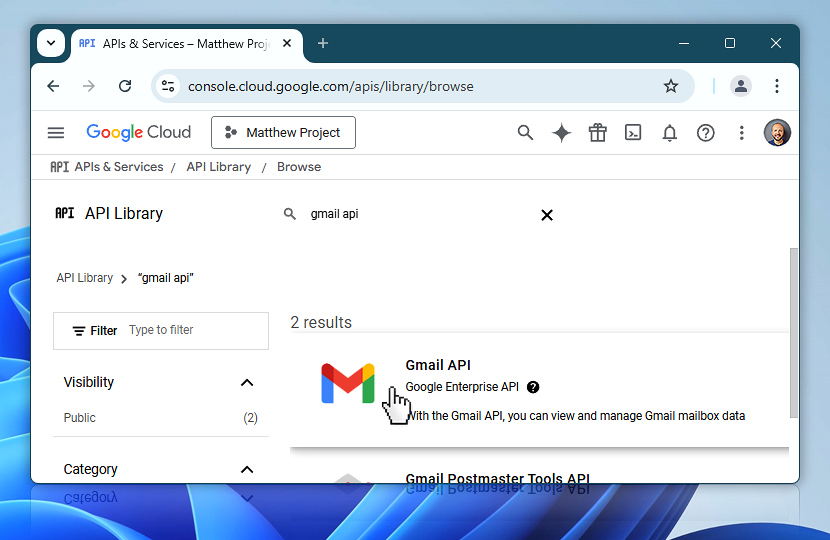
In the API Library, use the search bar to find the Gmail API. Begin typing gmail api and the results will update dynamically.
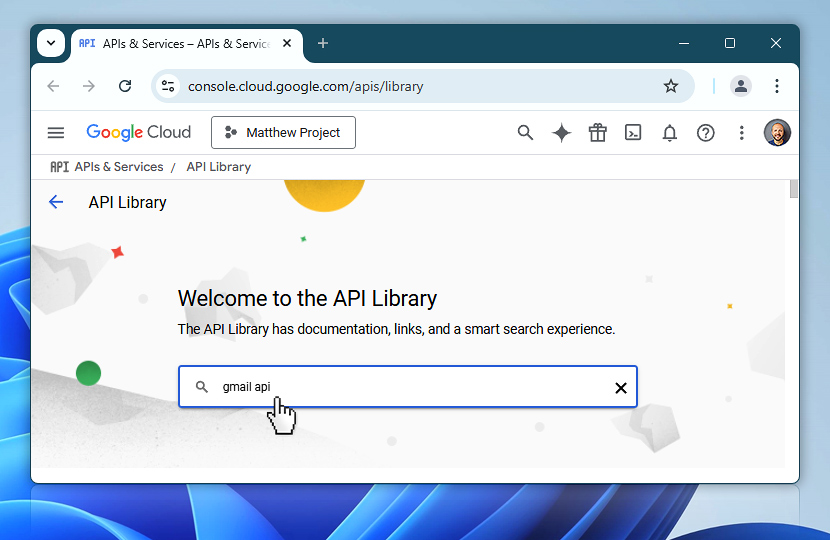
Once the Gmail API appears in the search results, click on it to open the details page, where you will be able to enable it for your project. This API is required to enable email functionality through Google services using OAuth 2.0 in Automation Workshop.
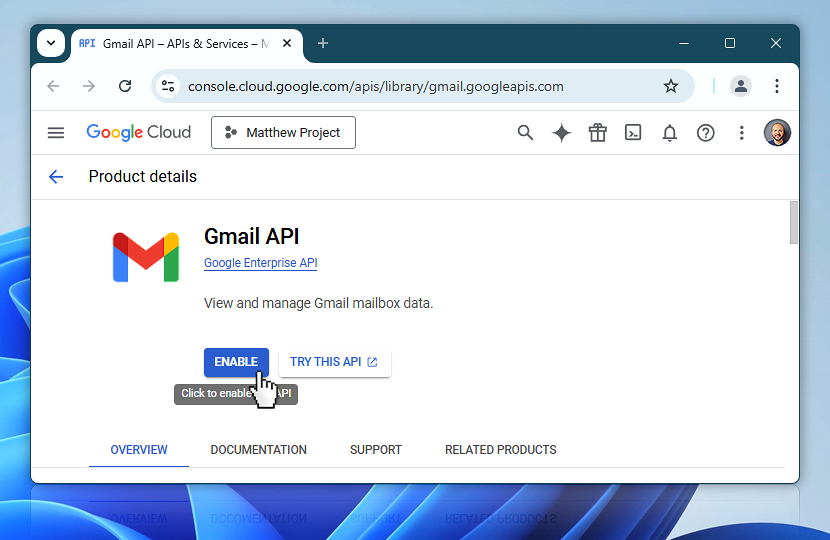
Once you open the Gmail API details page, click the Enable button to activate it for your selected project. This step allows your project to interact with Gmail services through the API using OAuth 2.0 authentication.
Credentials…
To use the Gmail API for sending messages from Automation Workshop, you need to configure proper authentication credentials. These credentials allow your application to request access to Gmail on behalf of a user or a service, depending on the selected flow. In this case, we are creating user-based credentials that support interactive sign-in.
Create credentials
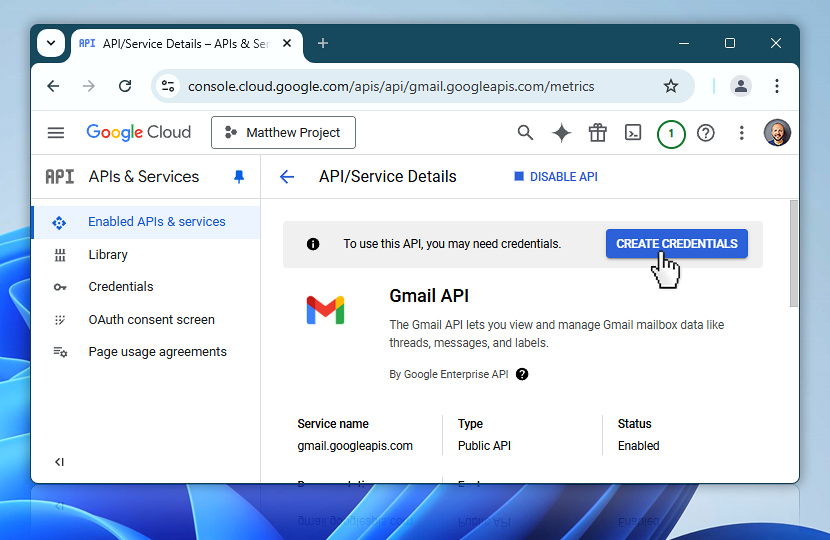
After enabling Gmail API, you will be redirected to the API management dashboard where further configuration options become available.
Click the Create Credentials button to begin setting up access. This process will guide you through creating an OAuth 2.0 configuration that can later be used in Automation Workshop to send authenticated emails through Gmail.
Gmail API is already selected. Choose User data to indicate that your application will access personal information on behalf of a user, such as their email address and mailbox content. Click Next to proceed to the OAuth consent screen configuration.

OAuth consent screen
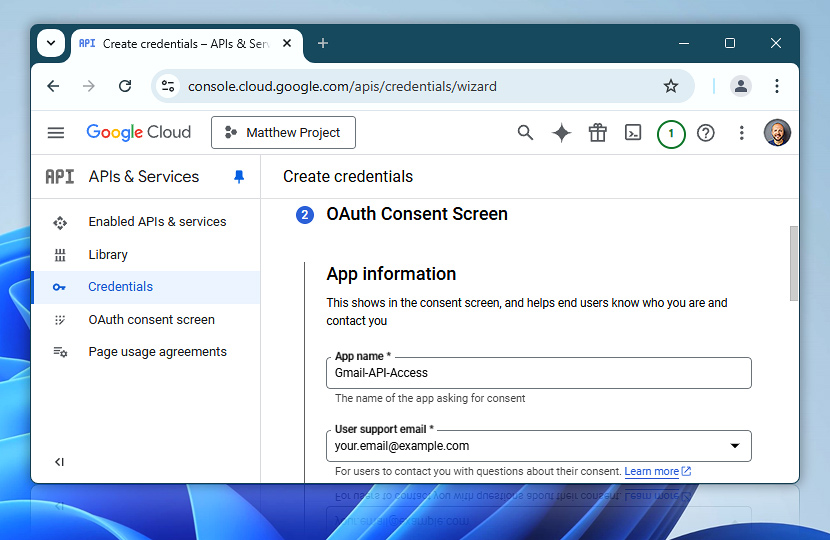
At this stage, you need to fill out the OAuth consent screen details. The App name is primarily for your own reference—it helps you identify what this OAuth configuration is for when you review it later. Enter a name that makes it easy to recognize its purpose, such as Gmail-API-Access.
For the User support email, enter your own email address. Since in most cases you will be the only user of this app, the support email simply needs to be valid and associated with your Google account. Once the fields are filled in, proceed by clicking Next.
Note: In this context, the App refers to Automation Workshop, which will use the OAuth credentials to securely access Gmail on your behalf.
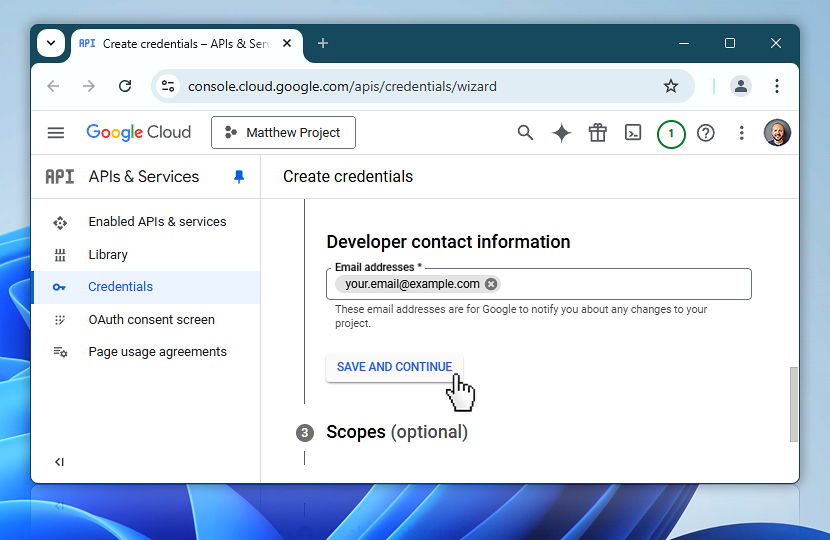
This step asks for a developer contact email address (for this project), which Google may use to notify you about important changes to your project. In most cases, you can simply enter your own email address here. Once the field is filled in, proceed by clicking Save and continue to move on to the next section.
OAuth scopes
OAuth scopes define what level of access an app is requesting from users. Click Add or remove scopes to define permissions.
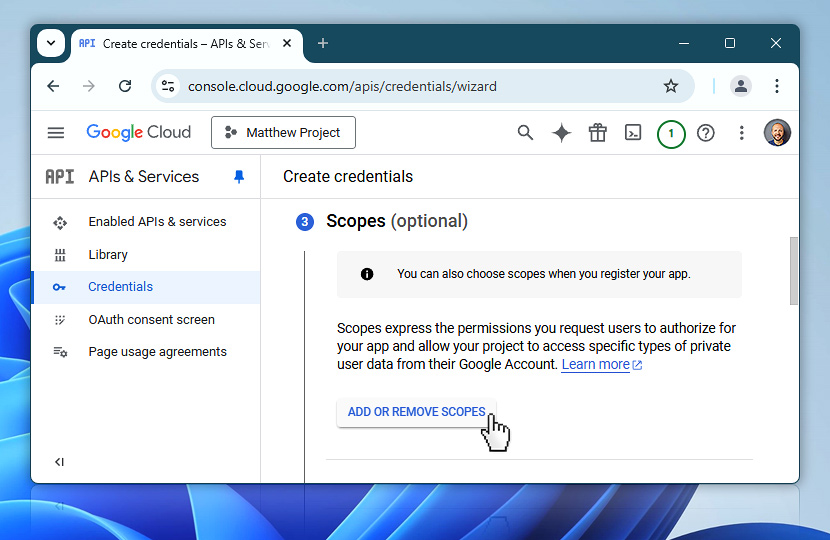
Since we are configuring access to the Gmail API, we will add the necessary scopes required to send email messages. These scopes allow Automation Workshop to request consent for the exact actions it needs to perform—sending email on your behalf.

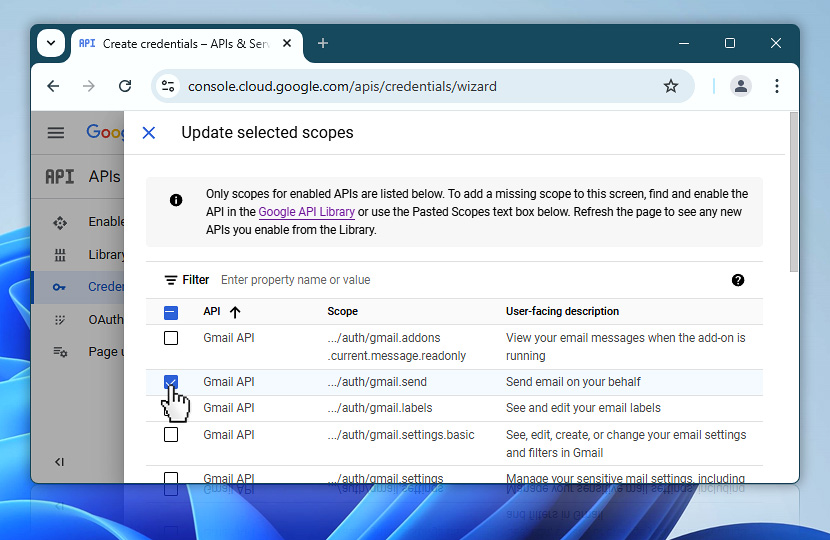
To continue, locate the Gmail-specific scopes in the list. You can either scroll through the available scope entries or use the Filter field to search for gmail. Once the Gmail-related permissions are displayed, make sure to select the …/auth/gmail.send scope. This permission is required to allow Automation Workshop to send emails on your behalf using Gmail.
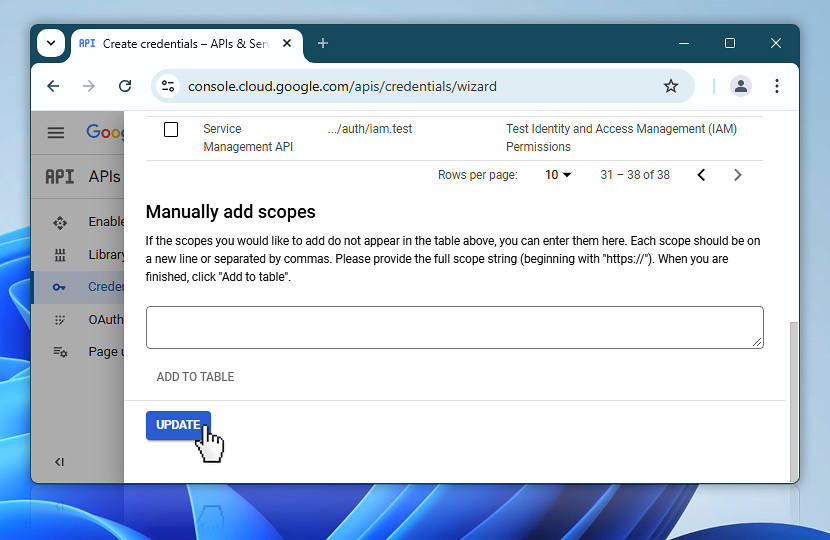
Scroll to the bottom of the list and click the Update button. This confirms your selections and attaches the required permissions to the OAuth client.
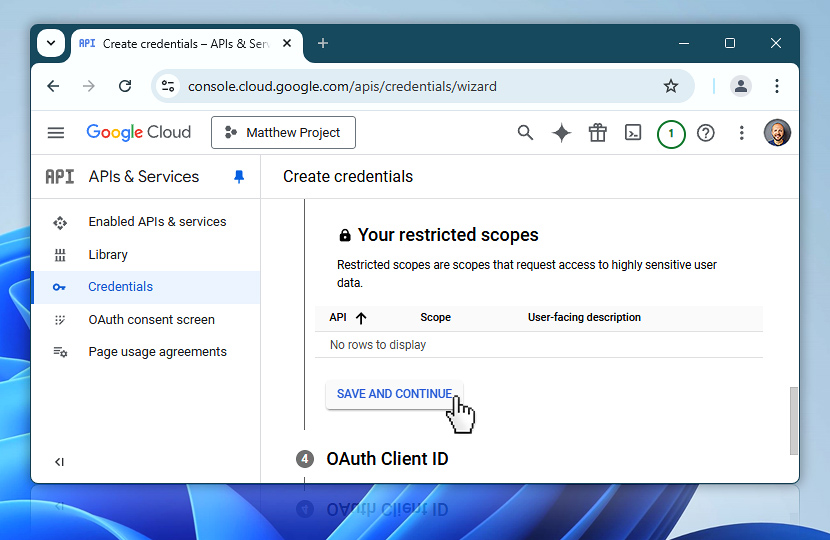
This screen confirms that the selected OAuth scope has been successfully added. The Gmail API scope …/auth/gmail.send appears under Your sensitive scopes, which is expected because it allows the application to send emails on behalf of the user.

Simply proceed by clicking the Save and continue button to move on to the next stage of the OAuth 2.0 client configuration.
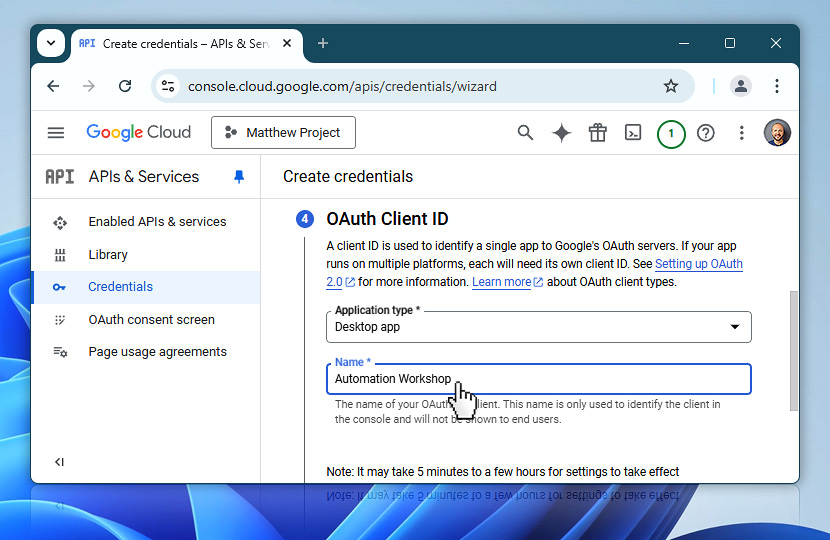
OAuth client ID
In this step, select Desktop app as the application type. This is required because Automation Workshop is a desktop-based automation platform that will be interacting with Google's OAuth system.
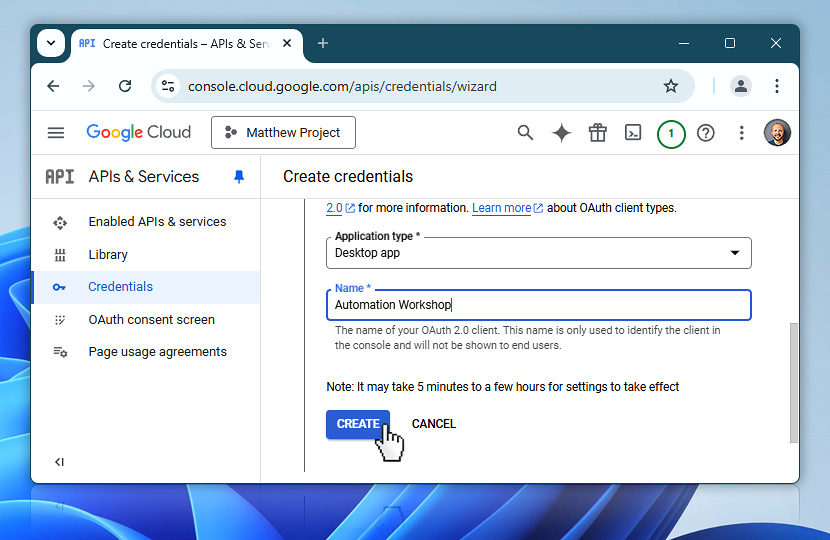
Then, enter a name for the client. This name is for internal identification only—use something that clearly indicates its purpose, such as Automation Workshop.
Once everything is filled out, you can continue to finalize by clicking Create.
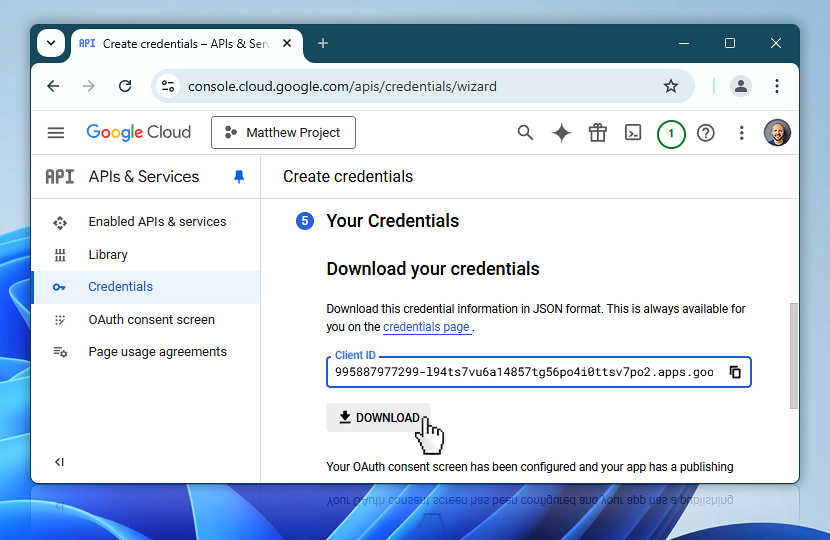
OAuth credentials
After completing the OAuth client setup, you will be presented with your Client ID and the option to download the credentials as a JSON file. This file contains both the Client ID and Client secret, which are required for OAuth integration.
You should download this file, as it can be used later in Automation Workshop to auto-fill some of the credential fields using the Auto-fill from JSON file option. This simplifies the configuration process and ensures accuracy when entering these important configuration values.
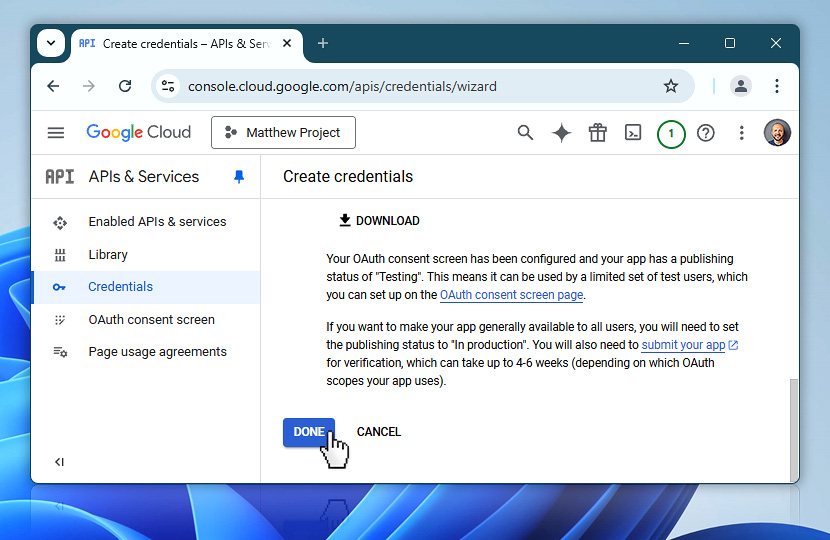
Once you have downloaded the credentials file, you can complete the setup by clicking the Done button. At this point, your OAuth consent screen is configured and your app is in Testing mode. In this mode, only a defined list of test users will be able to authorize access using the app.
Google Auth Platform
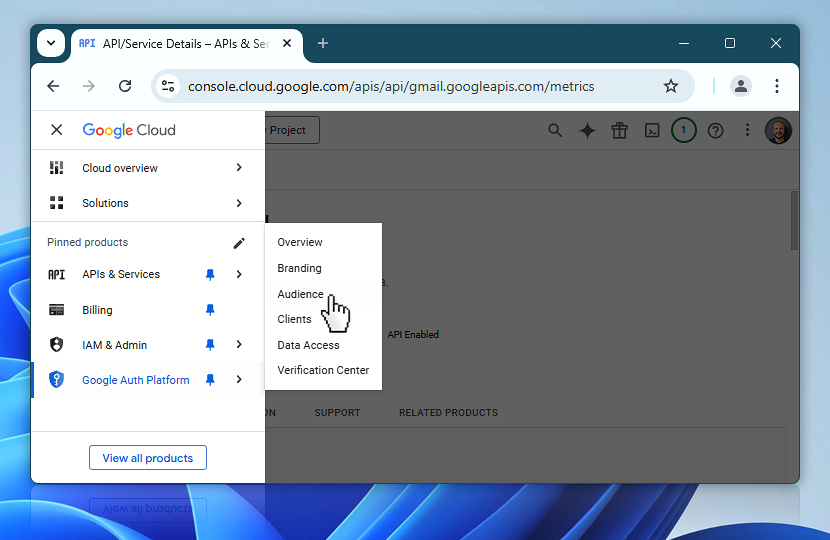
To access the Audience section, open the side navigation menu in the Google Cloud Console. If the Audience section is not immediately visible, click View all products and scroll to the Management category. From there, choose Audience from the list of available options.
The Audience settings allow you to define who can use your OAuth-based application. These options may vary depending on whether you are using a free Gmail account or a Google Workspace account. Free Gmail accounts typically have limited visibility and audience management, while Google Workspace accounts offer more granular control over domain-level access and publishing settings.
Google Workspace account?
If you are using a Google Workspace account, you will see an Audience setting labeled User type. In this context, Internal means that only users within your Google Workspace domain (your organization's users) will be allowed to access the OAuth-secured app.
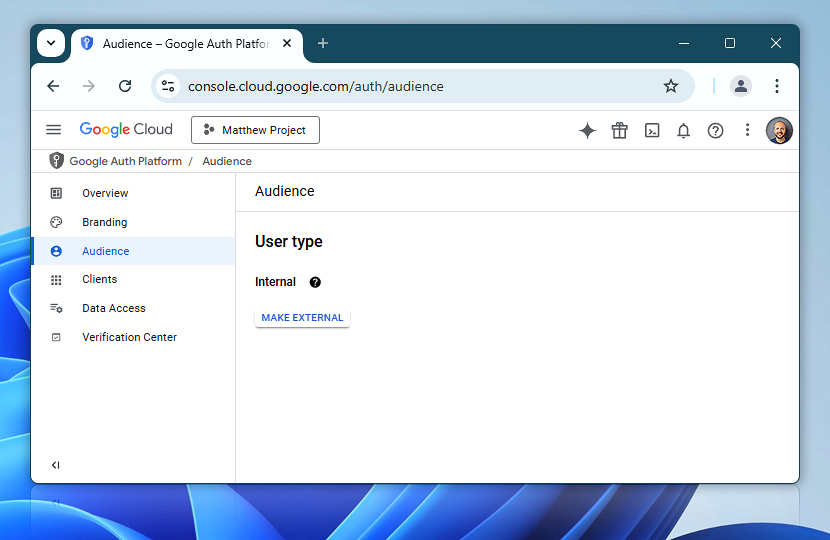
We recommend keeping the Internal setting selected unless you specifically need to authorize users outside your organization. This setting is more secure and is ideal for workflows that are only intended to run within your own Workspace environment.
At this point, the Google Workspace account setup is complete! Please proceed to the next steps for configuring this newly created OAuth connection in Automation Workshop.
Free Google account?
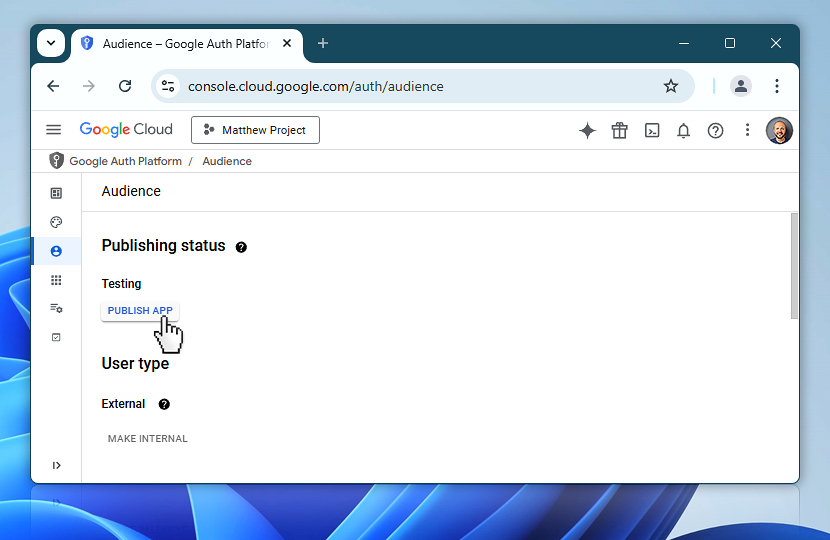
If you are using a free personal Google (Gmail) account, the OAuth app will be set to Testing mode by default. While this allows you to use the app with a small set of test users, Google recently began enforcing stricter time limits on tokens issued in testing mode—typically limiting them to 14 days.
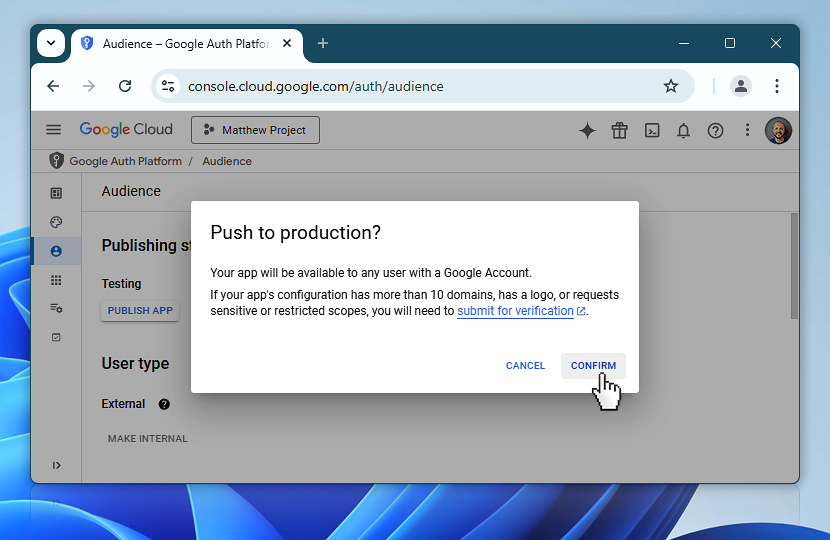
To avoid these limitations, we recommend clicking Publish App to move it out of testing. This will ensure long-term functionality of your OAuth integration with Automation Workshop, especially for unattended or ongoing tasks that rely on consistent access.
Click Confirm to push your OAuth configuration into production. This step is recommended when using a personal Gmail account to avoid expiration issues tied to testing mode.
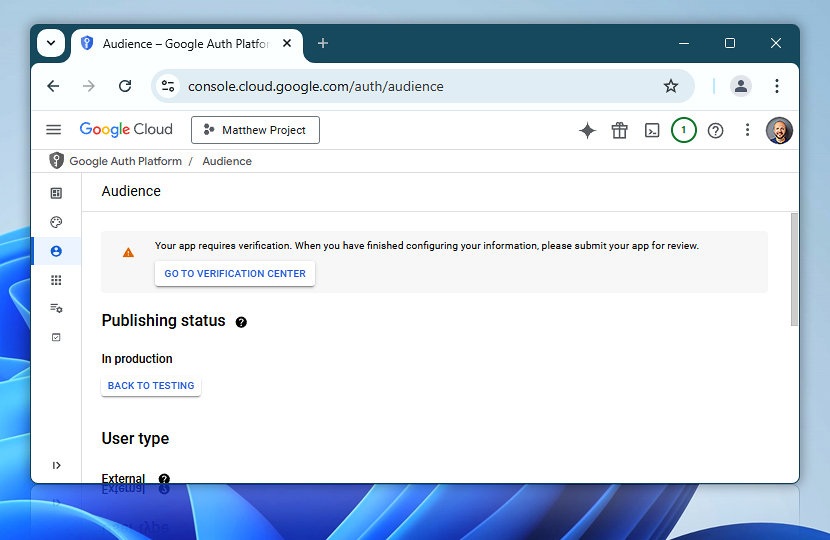
Once your app is pushed to In production, Google may prompt you to verify it. For most personal or lightweight Automation Workshop setups, you can usually skip this step without issues—especially if you are the only user.
However, if you run into limitations or authorization errors during usage, a workaround is to reuse credentials from a trusted open-source apps like Mozilla Thunderbird, which has already passed Google's verification process.
Next…
In Part 2 · Send first email using Google OAuth credentials, we'll take the OAuth configuration you have just created and use it inside Automation Workshop. This includes importing the downloaded JSON credentials file, connecting the Client ID and Client secret, and setting up a new OAuth credential.
Once configured, you will learn how to use this credential in a Send Email Action. We will walk you through sending your very first test email using Gmail SMTP with OAuth 2.0, fully authenticated and secure—without storing your password.
Assistance is here…
If you have any questions, please do not hesitate to contact our support team.