Some programs leave behind temporary files even after their purpose has expired. Over time temporary files can accumulate to significant numbers taking up a lot of space. One way to deal with the issue is to delete temp files automatically.
Overview
This tutorial shows how to set up a Task in Automation Workshop which will automatically delete temp files on daily basis.
How to delete temp files automatically? Creating a Task that will automatically delete temp files on regular basis is easy to accomplish in just a few simple steps. Namely, we will need to create a Task using Task Wizard, then add a Trigger which will execute the Task once per day, and add an Action that will delete files in the temp folder.
In fact, since there exist two temporary files folders (both User and System temp files), we will need to use the Delete Files Action twice to automatically delete temp files from both locations.
Create a Task
How to create a new Task in Automation Workshop? Open Automation Workshop Manager and choose New Task from the File menu. Alternatively, there is New Task button on the toolbar or a keyboard shortcut CTRL+N can be used. This will open the Task Wizard at Welcome tab. Proceed to the next tab to add the Task Scheduler Trigger (which will automatically start the Task on daily basis).
Configure Scheduler
How to add and configure the Task Scheduler trigger? Once in the Triggers tab of Task Wizard, click the Add button to open Add Trigger window with the list of available Triggers. To delete temp files automatically on regular basis we need the Task Scheduler trigger which can start Tasks on various schedules.
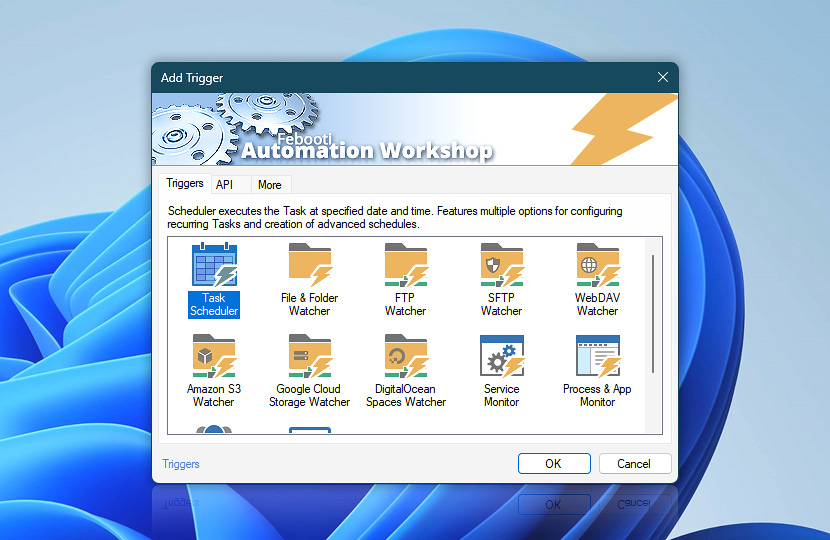
Task Scheduler can automatically launch Tasks with various periodicity, on specific months, dates, weekdays (including or excluding specific dates, weekdays and times of the day) or even more complex schedules. However, for the purposes of deleting temp files it will suffice to run the Task once per day. Choose the daily schedule and set the time of Task execution (e.g., 8:00 PM).
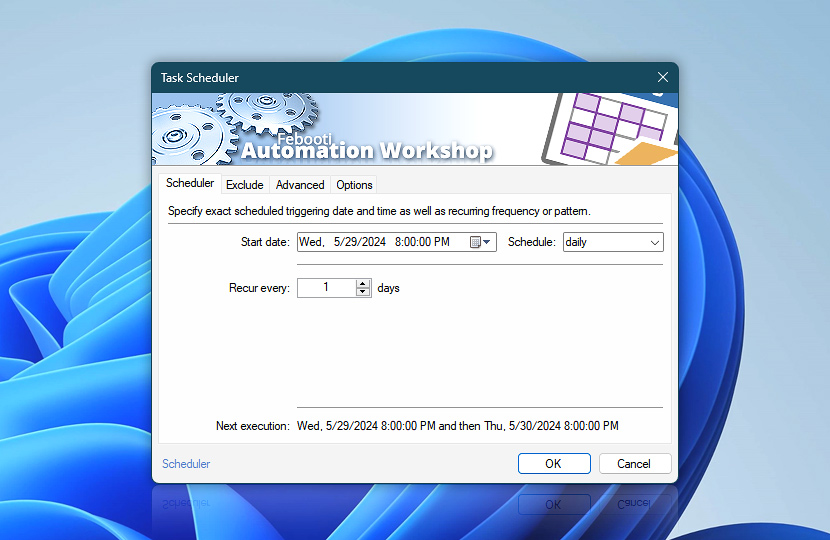
Click OK to add the Task Scheduler to the list of Task's Triggers. Click Next to proceed to the Actions tab to add the Delete File Action which will delete temp files automatically whenever executed.
Delete TEMP files
How to add and configure the Delete Files Action to automatically delete temp files? Once in the Actions tab of Task Wizard, click the Add button to open Add Action window with the list of all available Actions. Find and open the Delete File Action in the File & Folder category.
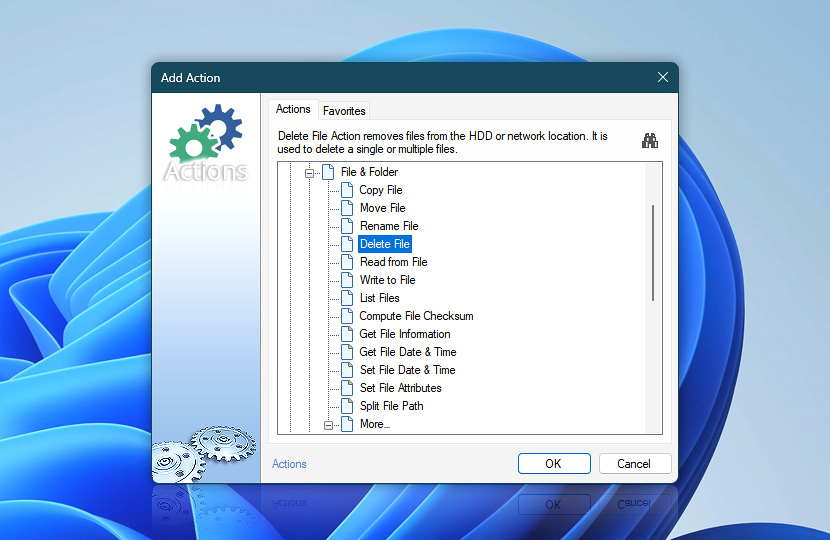
The File tab of the Delete File Action properties requires to specify which files to delete. While the Windows TEMP folder location is user-independent and can be retrieved from Variable Wizard, the user application temp folder location depends on the currently logged in user and has to be specified using a couple of simple tricks since the goal is to delete temp files automatically.
First, let us configure first Delete Files Action which will automatically delete temp files from Windows TEMP folder. Click on Variable Wizard button next to the File input to open Variable Wizard. Choose the Temp folder option available from the Folders subcategory in the System category and click OK.
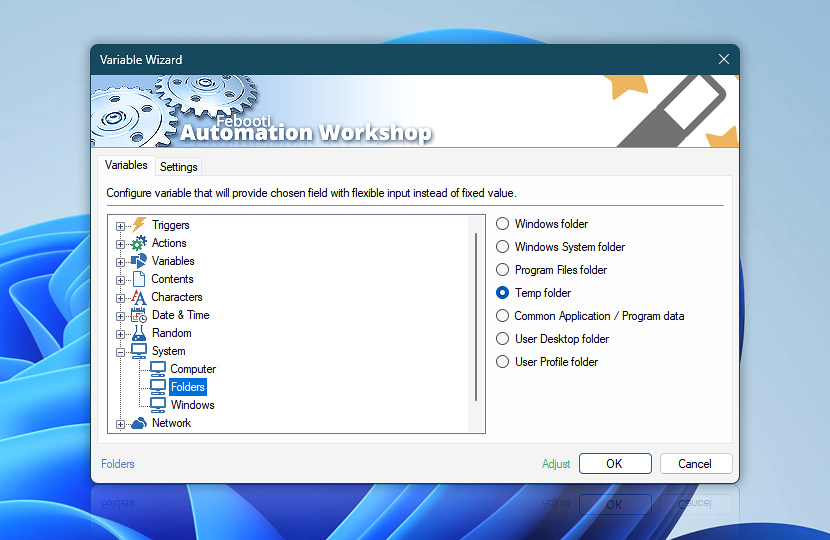
See that the File input now contains the Temp folder variable that universally refers to Windows TEMP folder (by default, C:\Windows\ folder, but also can be located in another path).
However, specifying Windows TEMP folder is not enough. To automatically delete temp files, these files themselves have to specified. Since the path of Windows TEMP folder returned by the Temp folder variable already includes the backslash character at the end, it is necessary to only add *.* so that the File input contains the following: Temp folder\*.*
![Delete file: [Temp folder\]*.*](https://i.febooti.com/i/automation-workshop/tutorials/delete-file-temp-folder.jpg)
When the File parameter is specified, go to the Options tab and mark the Include subfolders checkbox to automatically delete temp files that are located within subfolders of the Temp folder. Also, it might be a good idea to go to the Exclude tab and enable the option Do not delete files that are modified in last 24 hours to avoid deleting temp files that probably are currently in use.
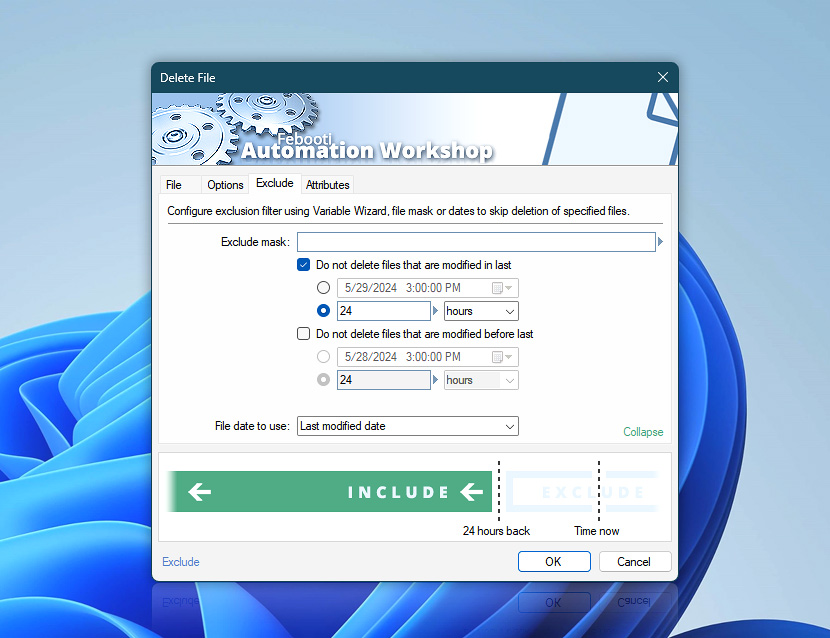
The configuration of the first Delete File Action is finished. Click OK to save the Delete File Action.
Delete AppData Temp files
Now, let us add the second Delete File Action that will automatically delete temp files from User Application Data TEMP folder (by default, C:\Users\ where username is the name of particular user).
Repeat the procedure by clicking the Add button in the Actions tab of Task Wizard and choose the Delete File Action from File & Folder category again. Once in the File tab, enter the following into the File input: C:\Users\
Highlight username, click Variable Wizard button and replace fixed username value with dynamic Current user name value (located in Service subcategory of Internal category in Variable Wizard). Upon execution, the Task will now automatically delete temp files from the User application TEMP folder belonging to the user that is currently logged into the system (not just one particular user).
![Delete file: C:\Users\[User name]\AppData\Temp\*.*](https://i.febooti.com/i/automation-workshop/tutorials/delete-file-users-appdata-temp.jpg)
Once more, let us mark the Include subfolder checkbox in the Options tab and specify to automatically delete temp files that are not modified in last 24 hours in the Exclude tab. Click OK and see that the Task now contains two Delete File Actions, each to delete different temp file folders.
Congratulations!
You have just set up the Task that automatically deletes temp files from both Windows and User application TEMP folders on a daily basis. The only remaining thing to do is to specify Run As settings, configure automatic email reports and name the Task.
Click Finish and the Task is activated. Now the Task Scheduler will launch the Task daily at 8:00 PM and the contents of TEMP folders older than 24 hours will be automatically deleted, freeing up disk space.
Ask for more…
If you have any questions, please do not hesitate to contact our support team.
